With this post, I'm just going to jump right into the class. I won't give away all the secret sauce / techniques that go into building 1911's, for that, you need to take the class. :-)
Also, this isn't going to be a debate, there are many ways to do some of the things we did in class. This is how we did it, this is all about showing what we did and and maybe encourage those that have thought they'd like to learn more about the 1911 or possibly build one, to do it.
If you love 1911s this class is totally worth it. I'll do another introductory post separate on the blog around why I wanted to do it, and why I built what I did.
With that said, how this will work, is I'm going to put photos in there and give some details around the types of skills taught and my own observations as a student.
Not all of these pictures will be of my gun, I mixed in some where Don's doing some demonstration around a concept and etc.
Lastly, don't blame AWT/Don for my photo or video quality, that stuff is on me as a student.

Here's the before picture. Note a few things. That is a bare Caspian slide, not a cut on it. Also notice the frame, that is a Caspian high capacity, this build is going to be a little old school with some new school mixed in.


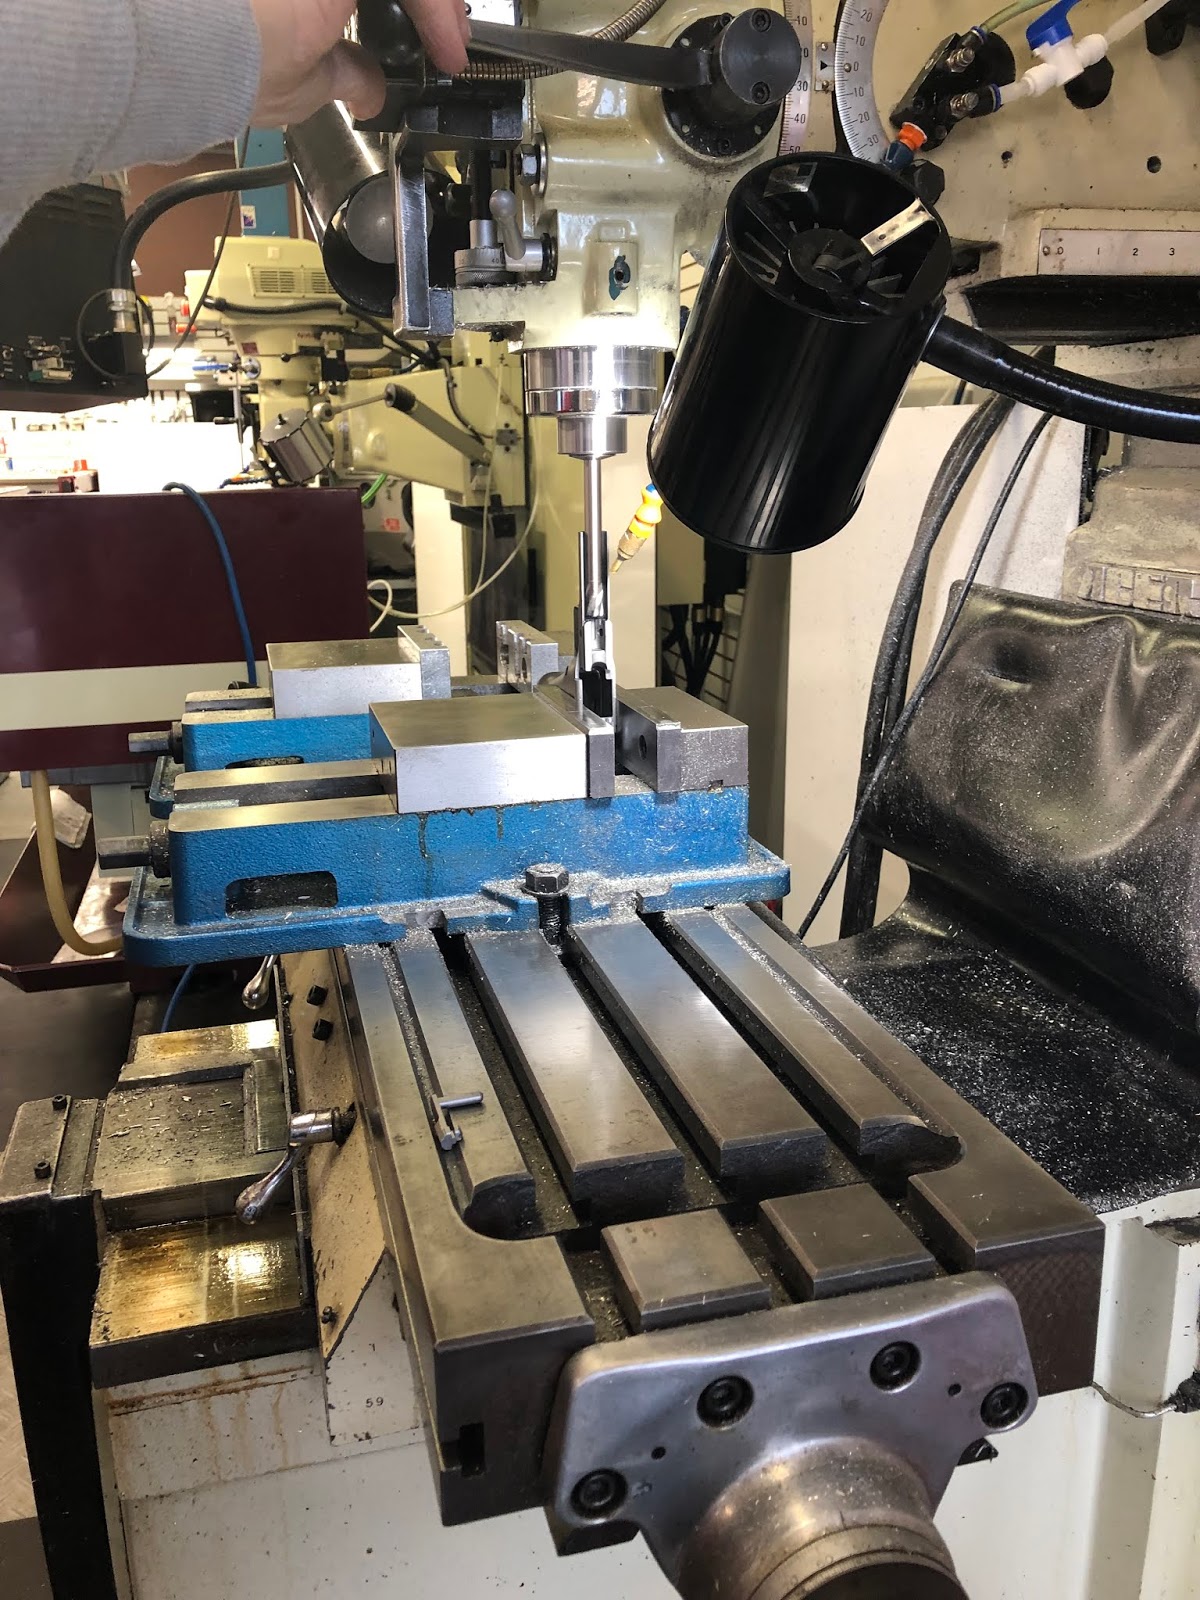
I found it really interesting in the amount of setup work needed to position parts in the mill.
To get the fit perfect, everything needs to be perfectly level/square. Then we have to figure out how much run-out there is in the piece as well and factor that into our cuts, here, we are taking a few thousandths off the height and truing up the rails for their width.
First cut I ever made on a mill was right here.

Here's Don helping us get setup for the cuts on the slide, there are a couple areas to take some care, especially behind the dustcover. Don is full of tips and tricks around how to get these cuts setup on the machine, cutting the slide rails as you pass by the dustcover was fun for a newbie, but you have to do it, and do it right.


These two shots were after we made the cuts on the frame and slide and did a bit of hand lapping.
My parts were pretty darn close after milling. I probably spent about 2 minutes lapping, checked with Don and he sent me back to lapping some more.
The reason he sent be back for more lapping was due to adding finish, since my final finish will add about 1 thousandth to all surfaces, I needed a little more lapping. It is buttery smooth now, after I get it back from finishing, I'll likely have to lap it some more.


Due to the nature of the lathe and having a bunch of rookies in the class, us rookies stayed off the lathe.
There were only a couple operations that needed some lathe time, fitting the bushing was a mandatory one. Don showed us how to do it, but he did the bushings for us. Getting caught in one of these machines would end your build in a hurry, that's a lot of power/torque that you are working in close proximity too.
There are a couple other things we did with the lathes that were not mandatory for the class, but Don was kind enough to do them for a little bling factor for a couple of us that insisted. Also, you'll see later how a lathe can help when you're cutting a particularly LONG chamber.

The class is getting a math lesson on how we are going to go about fitting the hood to the breach face of these 1911's. There's a little more to doing it right than what you see on the typical video on youtube when "bubba" builds his 1911 at home with hand tools only.
(Don never said "bubba".....that's on me folks)

As you can see, I now have a fitted bushing and the barrel in the slide, but it won't lock up as the hood is over-sized.
The worksheet pictured is used to guide you through the measurement and calculation process to get the hood matched up to the breach face dimensions. This isn't as straightforward as you would guess. The hood is actually offset from the center of the barrel and is potentially over sized by differing amounts on each side so there are some tricks and technique to getting the measurements for each side of the hood. The length cut is pretty straight forward.


Second picture up we are cutting the barrel hood. Once these 3 cuts are made you are pretty darn close to fitting, most likely, the beach face likely needs to be squared up. Remember, when you cut the hood for length and width, the corners are going to be perfectly square. That isn't necessarily the case with the breach face in your slide and they need a little "help" squaring up. After this that barrel should snap right in.
My Caspian High Capacity frame didn't come with a ramp cut. My barrel is a KKM gunsmith fit ramped barrel with a Wilson Nowlin ramp cut. So, in this second picture up, we are making the initial cut for clearance of the frame.
The picture immediately above is a little time saver cut. If you look at the lugs on the Wilson Nowlin ramped barrel, you will see the cut isn't perfectly square, there is a small radius there, it is there intentionally to help relieve stress so you don't sheer lugs off as easily in high pressure rounds like what I'm building. This setup is to make a small cut to speed up creating this radius. It is just a touch, then I used a file to clean up next to the edges.


Doing a little throating work and comparing it to a factory ramped barrel.

There, a nice zero fit barrel, that thing locks up nice, but now we have some more work to do on the lugs and lockup.


Remember, I said I had a gunsmith barrel? Well, this barrel is a .355 KKM, that comes with a VERY short chamber that you need to ream based on your caliber. Well, my caliber is .38 Super Comp, so it is quite a bit longer. So, we started cutting this chamber with a hand reamer.
But, as we had learned earlier, this steel is pretty slow cutting stuff. So, we cranked on it, cranked on it, and cranked on it.......then.......


....Forget the manual reaming, we set it up in the 4,000 lbs lathe that is capable of a ten thousandth of an inch of precision and bang out a perfect chamber for this thing in no time.


Here's where a little bit of the "art" comes in. Nothing will make you more nervous after all the precision machining you've been doing that to grab a Dremel and go to blending on a few pieces you can't really replace quickly or cheaply.
But, you quickly learn some tips on how to do it and produce a nice smooth blend. I wish I had a before picture, the extractor actually had to be ground on the belt sander first as that thing was sticking WAY out as well as the ejector. Now, this frame was pre-cut, so my blend isn't going to be as nice as a frame with milspec tangs that you cut yourself. But, I am VERY happy with out it turned out.
This is just the rough blend.
Now, the funny part of this is, I would check in with Don on my blend work.... his first assessment was, "That's not leaving my shop like that......." :-) He showed me a few areas I needed some additional work.

Which I had a better picture of this, I will have to take another later. That isn't a gap you are actually seeing, it is just some gunk that had worked back / out from cycling the slide, and that gunk is from all the grinding, a bit of oil and lighting. It is a very smooth blend.
NOTE - Speaking of gunk. Guys with Glasses, and I'm speaking to rookies like me that have never really worked in a machine shop making "chips". This tip is a biggie in the money saving department. DON'T EVER.....EVER....use your shirt to wipe smudges off your glasses in the shop.
Yeah.....fortunately, I already had a new set of glasses on the way. Your shirt slowly turns into sandpaper as you get "chips" on you.

Profile view of the blending we did, you can see what I was talking about with the pre-cut frame. I didn't have a choice on that with the frame. But if you have the choice and are doing a class like this, get the milspec tang and cut them, the beavertail gaps will practically disappear when you blend.

Bunch of "gun people" in a shop where precision firearms are manufactured, and we are bound to get distracted. That is a NICE .300 Remington Ultra Mag. But, before I go off on a precision rifle tangent, back to building a 1911.... Precision rifles will be for another post someday.


Sorry for the background, I took the pistol home that night and put it all together, even though there were a few tweaks internally, this is pretty close to being shootable at this stage.
Well, shootable if you don't actually use sights......
By the way, I'm switching out those grips.....I am not crazy about them. I found some G10's that are going to look much better with the color of the finish, but need some belt sanding love before I'll be happy with them. (Yeah,,,,,I know, respirator)

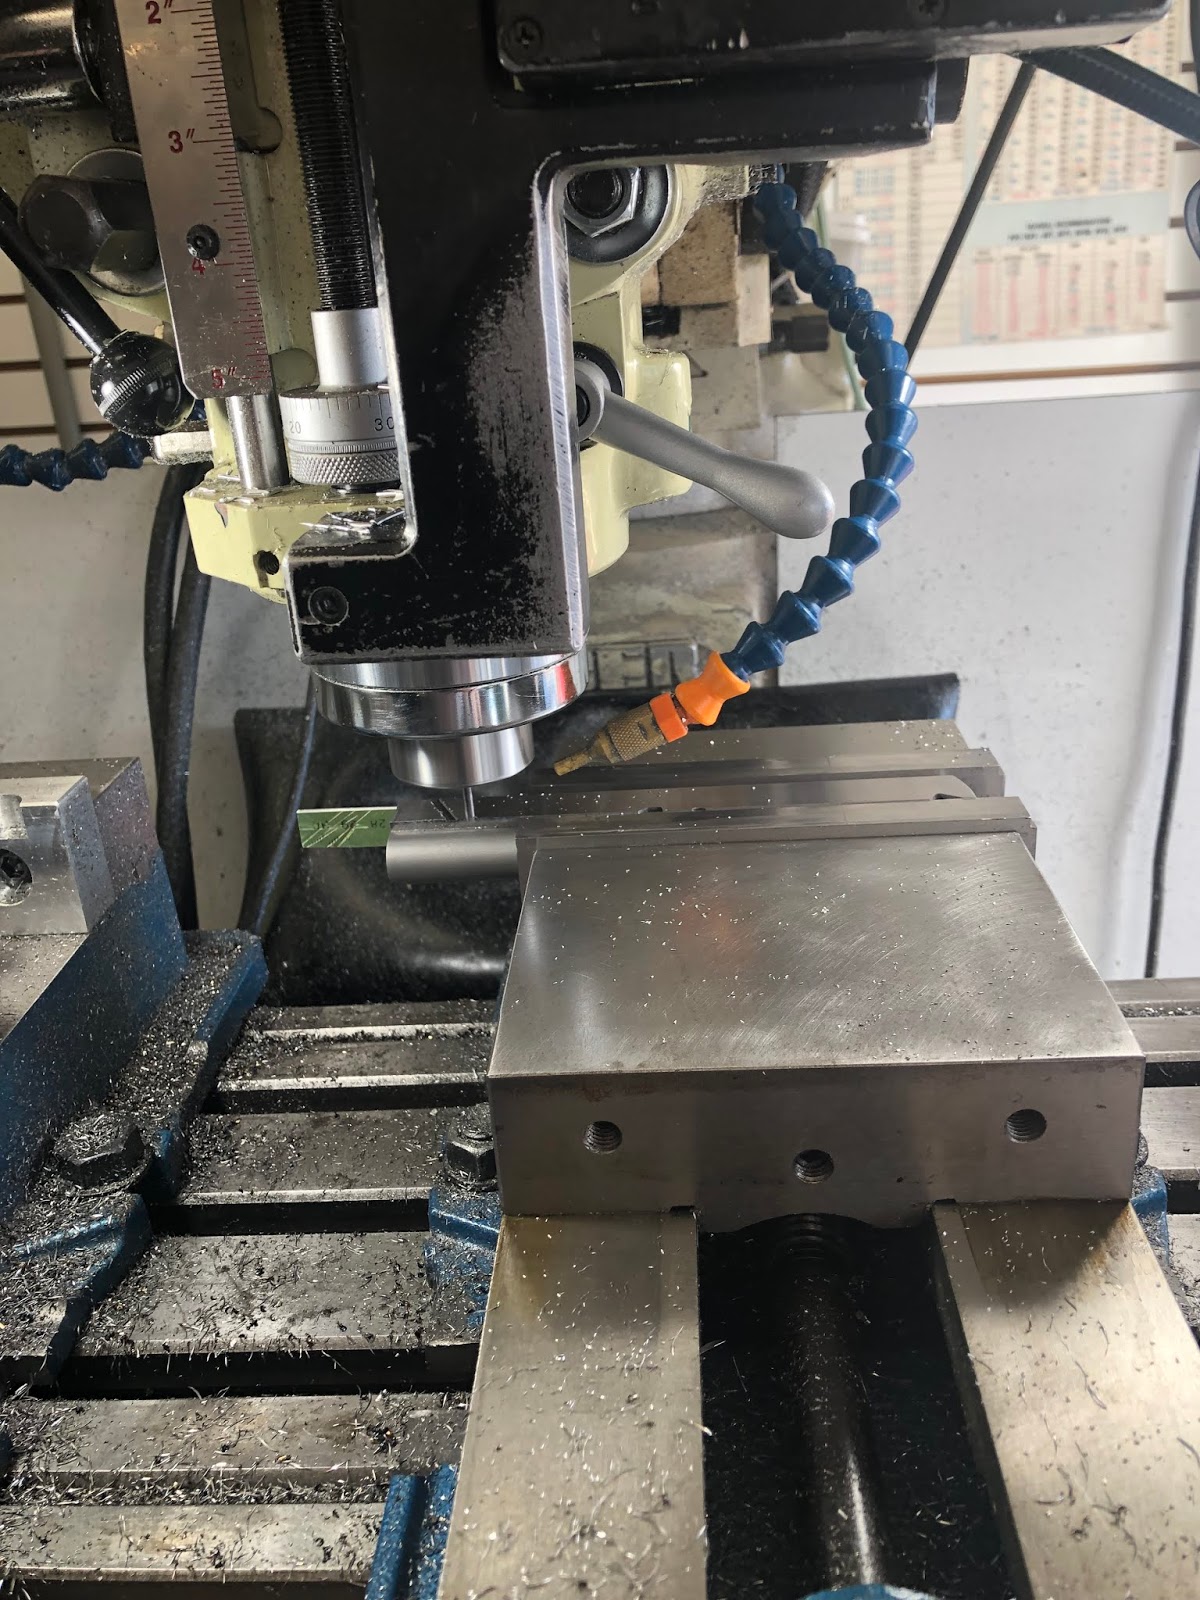
Ok, the lesson we are getting here is about how the 1911 slide actually has a slight taper in it. Although due to the angle and artwork, it is a little hard to tell, but we are going through this lesson as we are about to start making some cuts on the slides and some of those are for flat topping and tri-topping. Those cuts require the slide to be fixed in the mill perfectly parallel to the cutter. To do that, you have to understand how the slide tapers.

Flat topping one of the other slides from class. As you can see the slide is mounted in a jig that helps address that taper we were talking about. When mounted up and indicated, the mill will take nice even passes.

OK, Pike Spraggins (MOD 1), when you don't show up to class, this is how Don coats these pistols.
Just kidding. Just chucking up a Sharpie to confirm the cocking serration program we are picking to be the correct one.
Cutting some cocking serrations on my slide.

Doing the ball cut. This was a pretty fun cut. After the flat topping, cocking serrations, and ball cut, this slide is really starting to come to life.

Working on a Bomar cut, the math and prep work behind this is pretty interesting, especially when you put it in the context of how it was designed/meant to replace the old milspec sight cuts.


Mr. Barry West from www.ShootersConnection.com was a student in the class and wanted to checker his front strap. So, as you can see Don set him up with the Checkering Jig and set him to roughing in his lines (The first two pics above). Immediately above, Don is demonstrating to Barry how to hand cut a line to depth. Don demonstrated it, handed it off and Barry finished it off. He did a great job on it.

One bit of bling I wanted, was a reverse cut / deep recessed crown. The lathe makes short work of this. This is certainly a preference thing, I like the look and on this pistol, with a thick flanged bushing, I just think it is a cool looking touch.

Reverse cut crown with everything put together.

Still doing a little work on this one, it is 99% complete (before Pike gets it to coat). I'll update this again shortly once we have it in its final configuration.....the builder is being a bit indecisive.
I've wanted a Caspian High Cap for about 20 years. To me nothing feels better in my hand.
On a whole, this class was a tremendous experience for me. I've been a gun guy all my life. I've loved the 1911 since the first time I shot one. This was something on my bucket list and I learned so much about the 1911, tips, and tricks to make it run. AND, I have a work book/reference book that details out EVERYTHING we learned along the way.
I have covered this for you at a very high level. The technical specifics, that's to learn in class.....
Once, it is done, I'll post a shooting video and some pics on accuracy as well.
Sorry, long overdue, here she is finished. I had my friend Pike Spraggins at MOD 1 firearms do this awesome cerekote job, it is sniper gray and black trim, you can see the new G10 grips are a dramatic improvement.

And, as you can see, it is a SHOOTER, man has this pistol exceeded my expectations, that is a 1 mag / 18 round group:


No comments:
Post a Comment